Nail art pens are fun tools that can be used to add excitement to other nail colors. They allow users to be creative and make custom designs without having to spend a fortune at the nail salon.
Select Affordable Pens
Shopping for nail art pens should not break the bank, especially for beginners. Using affordable brands allows beginners to get familiar with how to use the pens and observe which techniques work best for them.
Sally Hansen
Sally Hansen is a well known brand that has line of easy-to-use pens called I Heart Nail Art Pens. They come in 17 colors and have a fine tip, a feature that lets users have more control over the designs they create. The pens can be purchased for under $10.00.
Kiss
Another affordable brand, Kiss, has a French Artist Pen Kit that can be used to create a French manicure. The kit comes with a tip guide to help create the tips, and a top coat to seal. The white pen can also be used by itself to add designs to the nails. Additionally, the company has, Kiss Nail Artist Fine Art Pen which comes in a pack of two. Both products are under $10.00
Purchasing
Both Sally Hansen and Kiss nail art pen products can be purchased from your local drugstores like Walgreens, CVS Pharmacy and Rite Aid Pharmacy.
Application of Nail Pens
Recommendations to keep in mind when using your new nail art pens include:
Good Environment
As with any nail product, you're going to want to use them in a well-ventilated area, but you don't want to use them directly in front an air source like a fan. This may give the polish a streaky or lumpy appearance when you are trying to paint.
Background Color Considerations
- Without background color: If you're going to apply nail art to your nails without a background color, be sure to add a base coat first to the bare nails. Let the paint dry completely to prevent possible staining of the nails.
- With background color: If you're going to apply nail art to nails with a background color, be sure to let that color dry completely before adding nail art. This will reduce the chance of the wet colors mixing and allow you to work on a dry canvas.
Practice
To get a feel for the pens, try practicing on a piece of wax paper first. This will also allow you to draft out simple design ideas that you want to use on your nails.
Don't Use Too Much Pressure
Take your time with the pens, and try not to press to hard. You will know if you're pressing too hard on the pens when the product becomes too thick too fast at the tip of the pen. This will cause the product to bleed all over the nails.
When the Nail Art Pen Bleeds
If the nail art pen you are using begins to spill too much product on the nails, this can be an easy fix.
- If the nail art pen you chose is water- based, simply wet a cotton ball and wipe of the excess paint off.
- If it is not water-based take a cotton swab dipped in polish remover and begin to gently rub the excess paint off.
Designs With Nail Pens
Adding nail art to the nails doesn't have to be a hard task. The simplest designs can look like they took a long time to do, and can be done in a matter of minutes.
Polka Dots

Polka dots look best on nails that already have a background color. After the nails have dried, use a nail art pen of your choice and create small dots all over the nail beds. For even more fun use two different colors of nail art pens for the polka dots.
Stripes
Adding nail art like stripes are another easy design for beginners to start with. They can choose from horizontal, vertical, or even slanted lines to their nails. To make the stripes pop, try using contrasting colors. For example, use a deep purple for the back ground color first and a yellow or gold for the stripes.
Stencils
Nail stencils are a great tool to use with nail art pens for creating designs that look complicated. Since the pens have fine tips, they are able to fit into hard-to-reach outlines.
This method is better than applying the stencil to the nail bed, then filling in the stencil with a regular nail polish. Filling in the stencils with regular polish often leaves a messy finish, and misses some of the details in the outline.
Options for Drying Nail Art
No one likes to sit and wait long periods of time for their nail art to dry. There is nothing more irritating than when one assumes the nails are thoroughly dry, only to smudge them and ruin the design. Products to help to speed up drying time include:
Top Coat
To speed up drying nail art, use Revlon Quick Dry Top Coat, which dries in 60 seconds. Always add a top coat to help prolong the wear of your nail art. Going without one will cause your nail art to chip within two days. With the help of a top coat, your nail art can last for up to seven days.

Spray
Using DeMert Nail Enamel Dryer Spray will the dry nails faster. The product will leave a light shine, and it also conditions the cuticles.
Nail Dryer
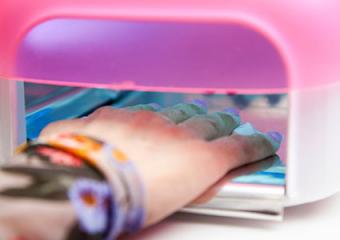
The Profiles SPA Professional Nail Dryer uses cool air to quickly set polish and move the drying process along.
Caring for Nail Pens
Storage
As with any other nail polish, you're going to want to store the pens in a dry and cool place. Do not leave pens outside in the car, or another place with extreme heat conditions. You can keep them in a small plastic container made for cosmetics, or use a Caboodles Cosmetic Case for a larger collection.
Cleaning
Clean your nail art pen after every use by rubbing the tip with a cloth that has nail polish remover on it. Cleaning these pens after every use will help to prevent them from coming clogged.
Why Use Nail Art Pens?
Nail art pens are much easier to use than nail art brushes or dotting tools used for designs. They allow you to have more control on the total outcome of your designs and you don't have to be a pro to use them. They are affordable and easy to store away. The options are endless when it comes to making new designs with nail art pens.


